Printers are essential tools for homes, offices, and businesses—but when something goes wrong, diagnosing the issue can feel overwhelming. From unexpected error messages to poor print quality or complete printer failure, these problems often disrupt productivity and cause unnecessary frustration.
The good news is that most printer issues follow predictable patterns. Once you understand the right troubleshooting steps, you can diagnose any printer problem like a seasoned professional. This comprehensive guide walks you through the process of identifying hardware, software, and connectivity issues to help you restore your printer’s performance quickly and efficiently.
Understanding the Basics of Printer Diagnostics
Before diving into specific problems, it’s important to understand the core areas where printer issues usually occur. Whether using an inkjet, laser, or all-in-one device, problems typically fall into three categories:
- Hardware Issues: Paper jams, worn rollers, clogged printheads, power failures, or mechanical damage.
- Software Issues: Driver errors, outdated firmware, incorrect settings, or corrupted print queues.
- Connectivity Issues: Faulty cables, unstable Wi-Fi, network conflicts, or unrecognized printers.
By narrowing down the category, you can diagnose the root cause faster and apply the right solution.
Step-by-Step Guide to Diagnosing Printer Problems Like a Pro
1. Start with a Visual Inspection: The First Rule of Diagnostics
Professionals always begin with a quick physical check.
Look for:
- Loose cables
- Paper stuck inside
- Error lights or blinking indicators
- Low ink or toner levels
- Paper loaded incorrectly
- Open doors or trays
A simple visual inspection often resolves up to 50% of common issues.
2. Restart Everything: Printer, Computer, and Network
It may sound basic, but a full restart is one of the most effective diagnostic steps.
Restarting helps reset:
- Internal sensors
- Network connections
- Temporary software bugs
- Stalled print queues
Turn off the printer, wait 30 seconds, and power it back on. Then restart your computer and router if using a wireless connection.
3. Check for Error Messages or Codes
Modern printers display error codes on a screen or through flashing lights.
What to Do:
- Note the exact error message or code.
- Look it up in your printer manual or manufacturer’s website.
- Follow the recommended diagnostic steps.
Error codes are direct clues that narrow down the root cause.
4. Test Printer Connectivity
If Using USB:
- Try a different USB cable.
- Switch to another port on your computer.
- Avoid USB hubs for diagnostics.
If Using Wi-Fi:
- Make sure the printer is connected to the correct network.
- Verify the Wi-Fi signal strength.
- Print a network configuration page—most printers have this option under Settings.
- Reconnect the printer to the network if needed.
If Using Ethernet:
- Check that the cable is firmly connected.
- Confirm the router or switch is working properly.
Connectivity problems are extremely common—fixing them usually restores communication instantly.
5. Verify Printer Drivers and Software
Outdated or corrupted drivers can prevent the printer from working.
Steps to Diagnose Software Issues:
- Open your computer’s printer settings.
- Confirm that the correct printer is selected.
- Check for driver updates.
- Reinstall or update the printer driver if the printer is not responding.
- Clear the print spooler (important for stuck jobs).
Professional technicians always check drivers early in the diagnostic process because software conflicts mimic hardware problems.
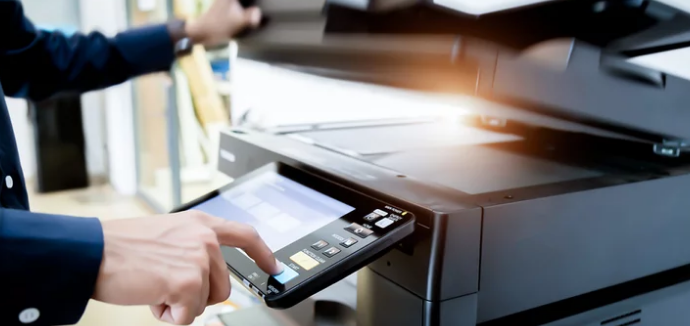
6. Print a Test Page
A test page is one of the most powerful diagnostic tools.
Why Test Pages Matter:
- They help identify whether the hardware or software is the problem.
- If the printer prints a test page but won’t print documents, the problem is on your computer.
- If the printer cannot print a test page, the issue is hardware-related.
Find the “Print Test Page” option in your printer settings or on the device panel.
7. Diagnose Common Hardware Failures
If software and connectivity are functioning well, the issue may be mechanical.
Look for These Hardware Symptoms:
✔ Paper Jams Everywhere
- Remove stuck paper.
- Clean or replace rollers.
- Use the correct paper type and load properly.
✔ Poor Print Quality
- Streaks, smudges, faded prints signal:
- Clogged printheads
- Low ink or toner
- Damaged drum or fuser
✔ Printer Not Turning On
- Test different outlets.
- Replace the power cable.
- Internal power supply may be faulty.
✔ Strange Noises
- Clicking = broken gears
- Grinding = roller issues
- Whirring = misaligned components
✔ Paper Not Feeding
- Dirty or worn feed rollers
- Misaligned guides
- Damaged pickup mechanism
Hardware issues require careful inspection, but most fixes are straightforward.
8. Check Ink or Toner Levels and Cartridge Installation
Even when cartridges seem fine, improper installation can cause major problems.
How to Diagnose Cartridge Issues:
- Make sure cartridges are firmly clicked into place.
- Remove any protective tapes or seals.
- Clean the electrical contacts with a microfiber cloth.
- Try reseating or replacing the cartridges.
A surprising number of print failures come from misaligned or dirty cartridges.
9. Inspect the Print Queue and Cancel Stuck Jobs
A full or stuck print queue prevents new jobs from processing.
Fix the Queue:
- Open “Printers & Scanners” on your computer.
- Select your printer.
- Cancel all jobs.
- Restart the print spooler service (Windows).
Once cleared, try printing again.
10. Use the Built-in Troubleshooting Tools
Most printers have diagnostic features such as:
- Printhead cleaning
- Nozzle check
- Alignment test
- Network diagnostics
- Error logs
Run these from your printer’s touchscreen or computer software to pinpoint issues quickly.
Advanced Tips for Diagnosing Printer Issues Like a Real Technician
1. Perform a Hard Reset
Unplug the printer for 60 seconds to reset internal hardware chips.
2. Inspect Internal Components
Only if safe—look for:
- Toner spills
- Loose gears
- Dust buildup
- Damaged wiring
3. Test with a Different Device
Print from a phone or laptop to isolate whether the issue is with your printer or primary computer.
4. Use Diagnostic Pages
Laser printers offer:
- Supplies status page
- Event logs
- Calibration pages
Inkjet printers offer:
- Nozzle checks
- Advanced color tests
These pages reveal internal hardware or alignment issues.
When Should You Call a Professional?
You may need expert help if you encounter:
- Repeated paper jams despite cleaning rollers
- Burning smells or smoke
- Broken fuser or drum units
- Clicking or grinding noises from gears
- Printer fails to power on completely
- Severe overheating
These issues require professional tools and replacement parts.
Final Thoughts
Diagnosing printer issues doesn’t require being a technician. With a structured approach—visual inspection, checking connections, testing software, running diagnostic tools, and inspecting hardware—you can solve almost any printer problem like a pro.
By mastering these techniques, you’ll save time, avoid unnecessary repair costs, and keep your printer running at peak performance. Whether you’re dealing with paper jams, poor print quality, or connection failures, this comprehensive guide gives you the expert-level knowledge you need.
Also Read :